Wednesday, August 21, 2013

Beautiful Washi Tape Cards


I have a friend who is very creative when it comes to making cards.

This evening after work she invited me to her home to play.

These cards are super simple and fun fun fun to make!

Washi, stamping, and a bit of bling.
How much easier could it be?

A bit of scrap printed paper and a strip of washi
 makes the inside of this card super adorable.


The bicycle washi was purchased at Office Depot
just this evening. :) 


This is the card I came up with to use the bits if washi scraps.
Kinda cute, huh?


This card is in progress-
it needs some more scraps.

How do you like to use your Washi tape?
How many rolls of Washi do you own?
I would love to hear from you. :)

Saturday, August 10, 2013

Super Simple Washi Tape Tag


Thomas's parents gave him a bike for his birthday. The easiest way to wrap an item that large and bulky is to not wrap it at all and hide it somewhere and make a treasure hunt to find it's location. I made this cute tag with scrap paper and a few darling styles of washi tape which I was itching to use. Can you guess how old Thomas is?

Friday, April 19, 2013

Girls Night Out

Saturday evening of General Conference is considered 'Girls Night' for many Latter-Day Saint women. As the men head out for Priesthood session women have many options for shopping and girl only activities. Amanda and I had decided to go to SLC to spend time with Andi. We considered getting a perm for Andi so that when she had her baby in a couple of weeks she would have an easy to care for hair style. We had also considered pampering her with a pedicure. Amanda and I hadn't been at Andi's home long when Andi's water broke. From that moment Andi was all giggles and excitement. Derek was nervous and wasn't sure he was ready for this change to his plans. Amanda and I were happy that we just happened to be there at the right time. Our plans were changing quickly and we were loving it!

It didn't take long for little baby girl to arrive. She was born at 11:27 pm on Saturday April 6th. She was a tiny 5 pounds 10 ounces and 19 inches long. And she has lots of soft dark hair. What a fun surprise!

Once Derek held his little girl his nervousness was replaced with immense love and devotion for his little Sophia. There is a special bond reserved especially for daughters and fathers.

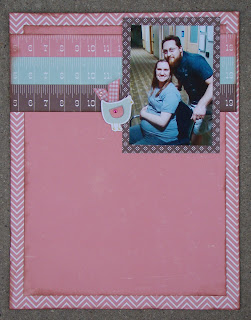
Andi had asked me earlier in the week to make some pages for her baby girl's baby album. Luckily I had purchased the paper and supplies on Friday. As I listened to Sunday conference I designed the pages and added photos taken the night before. I was pleased to be able to present the finished pages to Andi when we visited the new Crockett family Sunday afternoon.

I left empty spaces on the pages for journaling and messages from visitors. The pages match the baby journal Andrea already has for Sophia. The paper line I used is called 'Bundle of Joy' designed by Echo Park. I purchased it from allscrapbooksteals.com. 


The pages are ready for Andi and Derek
to write about the arrival of their little girl.

I have always known that Andrea would be an amazing mother.
This evening was proof to that.

Baby Sophia

We had to keep baby vertical so her food would stay in her stomach.
Her blood sugar levels needed to improve.

First time as a Grandma for Sharon Crockett

Plenty of room for well wishes from visitors.
A title and embellishments will be added to this page
at another time.
 
So fun to decorate with the adorable Echo Park stickers
from the Bundle of Joy collection.


Washi, Washi, Washi

Smashi washi. :)


How much washi tape is enough? Does anyone know?


I do know that it is fun to 'smash' washi. So much fun! Plus it's a guarantee that my washi tape gets used. What good is 26 feet of printed tape unless you use some of it?

Saturday, April 13, 2013

Laffy Taffy Flowers

To celebrate spring I created a quick little treat for my Primary class. Laffy Taffy flowers! The kids loved them, of course.

Paper flowers with Laffy Taffy sticks for stems.


I liked the style of a large daisy stamp I have. I stamped the first flower, cut it out and used it as a pattern to trace and cut flowers out of double sided card stock paper from my stash. I inked the flower petals.


In the center of each daisy I cut two slots to thread ribbon through. I attached the taffy to each flower by sticking the taffy stick through the ribbon loop on the backside, which was made by threading the ribbon through the slots; and then tying the ends of the ribbons in a cute knot on the face of each flower.


Wednesday, April 10, 2013

Featured On Another Blog!

Check this out! My work is featured on another blog.  Yay for me!

www.allscrapbooksteals.blogspot.com

Teresa Collins Freestyle Kit

I'm off to work. Hope your day is scrappy!

Thursday, April 4, 2013

Happy Mom's Day 2 Me!

Last year Andi made an adorable card on Shutterfly and gave it to me on Mother's day. Some people have a talent for writing sweet and cherished words and sentiments in cards . . . Andi is one of those people. I have since memorialized the beautiful card onto a 12 x 12 scrapbook page.


The card is sewn onto the page so that I will forever remember the sweet words of the note. The purple stitching adds to the fun spring colors of the Little Yellow Bicycle paper used.

Sunday, March 31, 2013

Baby Shower Decorations and Banner

Andrea is having a baby in April so Katy and Amanda planned a shower to celebrate. The mission call banner came down and a baby welcome banner went up. It was a fun transformation since I made tissue pom poms in several colors to match baby's bedroom.


 The banner says, "Welcome baby girl Crockett". The pennants are sewn onto a long yellow satin ribbon. The letters are stamped onto paper, cut out and glued onto individual pennants. I added a silk yellow daisy to dot the 'I' in the word girl. I calculated how to cut the pennants from 12x12 paper utilizing the dimensions to my benefit. More pennants per page. The tissue pom poms were actually fun to make. I got four small poms from one package of ten count colored tissue. (a dollar at Hobby Lobby). I attached a doubled strand of curling ribbon to the center of each pom before I fluffed the tissue. Amanda tied the bows and tacked them each to the ceiling in varying lengths.


The results were so simple and easy that Andi decided she would use the decorations again at a baby shower given by the Crockett side of her family.


I like the effect of the trailing curling ribbon and flouncy bows.


It was a fun celebration with a lot of baby headband making and visiting. Andi received  a lot of expert advice from so many experienced young mothers. It was a perfect party thanks to all the wonderful guests.

Thursday, March 28, 2013

Spring Bird Cage And Modge Podge Eggs

At my home birds are arriving daily from their winter trip south. I hear their constant chatter as they congregate around the bird feeders just outside my windows. Spring certainly is a cheerful time of year.


This little project was fun to create. I cut thin strips of paper from patterned paper made by Little Yellow Bicycle. The thin strips were then utilized for coloring the eggs and making a comfy nest for my paper chicks to hatch in. I layered strips of paper onto plastic eggs with modge podge to give their shells color. For the nesting material I curled strips of paper by gently pulling them across the blade of an open pair of scissors.


I added a dainty covering by attaching tulle to the cage dome, which promptly attracted a flutter of paper butterflies. Each butterfly was created using two contrasting butterfly wing die cuts (one solid and one cutout), and by stitching the center of each set and folding the top pair of wings open.
I added a few extra details in the mini pennant banner draped atop the dome, a cascading sheer ribbon for the butterflies to play with, a beautiful tail for our birdie and a perfect view from his birdie perch.


I display this touch of Wimsey on a shelf above our stairway where it is in sure to be noticed and admired.
Best of all it adds a touch of spring to my home.

Beautiful Emma On A Special Day

I teach seven and eight year old children in primary on Sundays. Emma is one of the beautiful girls in my class. She recently turned 8 and was baptized. She was excited about her special day and I was one of the many friends she invited to be there when she was baptized and confirmed a member of The Church Of Jesus Christ Of Latter-Day Saints. Emma's charm and purity is evident in the things she does and the choices she makes. She is a wonderful person to know.

I wanted to give her a birthday gift with special meaning. I was able to take a photo of her after her baptism and put the picture in a satin frame and prettied it up a little bit with paper, gems and ribbon before I gave it to her later that very day. I hope she smiles every time she remembers her 8th birthday. I smile every time I think of her.

Saturday, March 23, 2013

Hexagons And Painting Walls

The way my mind works I can be intensely into one project while the inspiration and details for a completely new one forms in my mind. For example it was while I was deciding on paint colors and glaze techniques for my bedroom walls that this double page layout drew itself in my mind. I knew the colors, photo placement and the details of the layout. I knew the photos to take. You could say that the combination of paint chips in a variety of shades and hues along with the pleasing shape of the hexagon was the inspiration for me to visualize a finished scrapbook page. It was weeks after the bedroom walls were painted that the opportunity arose to create the scrapbook pages in real life.

It would be marvelous to have the freedom to finish more of the ideas which come to my mind. Some people get paid to play. Maybe that will be me someday. :)


How do you make more time for the things you really love to do? Is what you do for a living following a dream? I believe that dreams should be big and that at least some of your favorite dreams should come true.

Wednesday, March 13, 2013

Forever Sisters

Just a quick share of a fun scrapbooking page using a little bit of stamping, inking, cutting, ribbon, and such. I do love to play with paper!


Be Creative everyday! Karen

What Is More Important? The Paper Or The Embellishments?

Just the other day American Crafts posed a good question to the on-line community. Which is more important? The paper or the embellishments? Even though there were a few gals who insisted that great embellishments are highest priority the general consensus was that the PAPER made the project! I agree that great paper is crucial to a great project. How many times have I made the 'embellishments' from the paper? I even buy extra sheets of paper with the intent of having one to cut from. Many of the best embellishments are made from the paper.

For this 'Jayden' page I cut flowers from an extra sheet of the paper. That way I get to position the flower pattern precisely where I want it. The rosettes are cut from the paper, as well as the borders, title, and the epoxy buttons. The paper I chose is designed by Close To My Heart. It is beautiful! So is Jayden!

Wednesday, March 6, 2013

Amanda Joelle's Art

With Amanda soon leaving home for a year and a half to serve a mission for The Church of Jesus Christ of Latter-day Saints we thought it was about time we actually created a website to promote and sell her art work. It is a work in progress, with some weeks having more progress than others.

Eventually we will have all of her art offered for sale. The set up costs are quite a bit per piece so we will do one at a time as funds become available and as customers express interest.

Take a peek at her site by going to amandajoelleart.com. Please let friends and family know that every purchase will help support Amanda's mission service. She will be serving in Long Beach California beginning in May.

About a year ago Amanda did a couple of charcoal drawings of relatives. I created a double page layout highlighting the drawings she did of Bruce and I. It makes me happy to showcase her amazing talent. I love seeing Amanda share her artistic gift!


Monday, February 25, 2013

Johnathon At 3 Months

    The vivid and happy patterns of Pebble's 'Family Ties' paper collection was enough inspiration for me to finally get these adorable photos of my grandson onto scrapbook pages. This little guy lives FIVE hours away which makes me sad. But I am grateful for the ease and convience of the internet and blogs . . . cause that means I get to see him everyday!


    I used the chipboard flowers and papers from the Pebble's 'Family Ties' collection. The ribbons are from American Crafts. Alphabet stickers are American Crafts thickers 'Hugs' in leaf, Amy Tangerine thickers 'Lovely' in a teal textured foam rubber, and October Afternoon 'Mini Market' Stickers in green & cream. Edges are inked in Color Box Chalk chestnut roan. Cute guy courtesy of Jim and Becky.

Saint Patrick's Day Banner

    I was inspired by a cute banner Melissa, a gal from Oh My Craft's made out of seven card stock shamrocks and green wire. She had so cleverly adorned the end pieces with gold rosettes from the Bravissimo collection (which they currently have on sale). Melissa let me trace a shamrock and I purchased 2 of the gold rosettes. My penny pinching daughter challenged me to utilize only supplies I already had at home. The green and gold glitter card stock was left over from Christmas projects and I dug through old patterned paper and found enough green to match the green polka dot paper I had leftover from a more recent project I had done using Pebbles new 'Family Ties' collection. Even the shamrock stickers and embellishments were things I already had. SEE THERE IS A REASON TO PURCHASE THE FUN STUFF WHEN YOU SEE IT! Total cost of this project: 60 cents.


Saturday, February 23, 2013

Where In The World . . .

 . . . will Amanda be called?

    Amanda has submitted her papers to serve as a missionary for The Church Of Jesus Christ Of Latter-day Saints. We have heard that her status is 'assigned'. Which means the mailman should be delivering a large envelope to her on Wednesday!

    Am I giddy? Just a bit. :)

    When Amanda officially opens this large envelope she hopes to celebrate the exciting moment with her friends and family. In other words it becomes a party! And this party requires some festive decor. Thus- the fun banner Amanda and I created and at this moment I am bragging about to the world (or whomever will look).

    Look! Look at our banner! We found various country flags at a local map place and cut triangle pennants from a travel atlas we purchased cheaply at Wal-mart. Stapled them alternately onto a long piece of jute. How simple and easy is that? I made the letters by stamping acrylic paint onto a piece of card stock with a foam alphabet stamp (Making Memories), allowing time to dry before I hand cut-out the letters. Then glued them onto the map pennants.

    I want to make invitations out of pages of the atlas folded like a map, but Amanda is nixing that idea. Silly mom! (I'm making a few anyway.)